


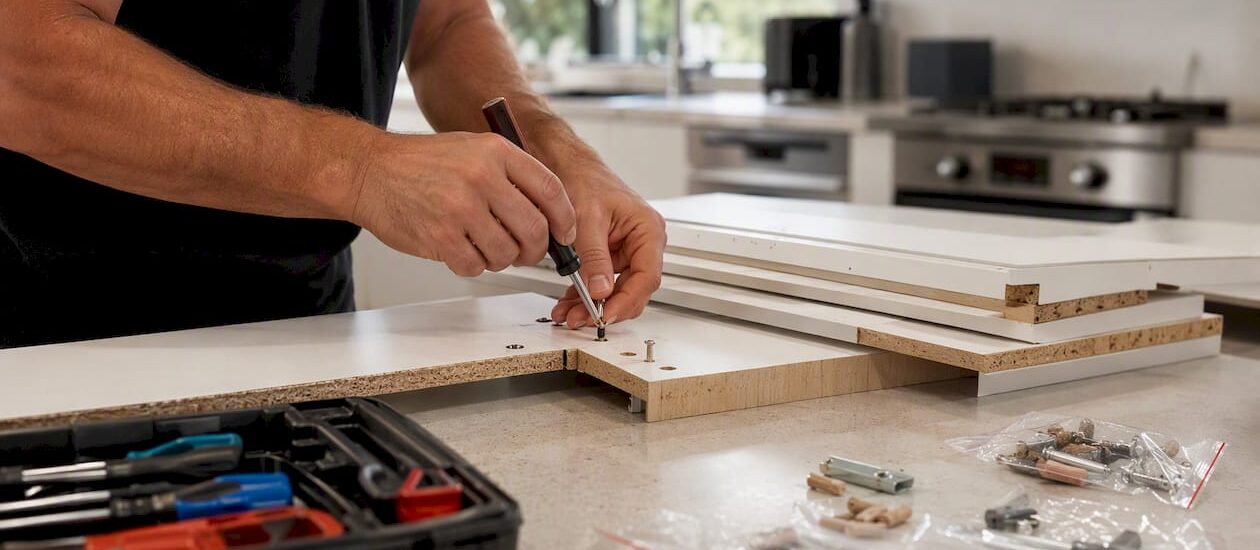
Start with the biggest pieces first. Beds, wardrobes, and dining tables should come apart before anything else, because they eat the most truck space and carry the highest damage risk when moved whole.
Three things to do right now:
If you’d rather hand this off entirely, Onyx Removals handles disassembly and reassembly as part of its residential service, tools and all.
Pro Tip: Photograph the underside of tables and the back of wardrobes too. Those angles show you exactly how the frame connects, which saves real time when you’re reassembling at the other end.
Furniture disassembly done right, with photos taken first, hardware bagged immediately, and components wrapped before stacking, prevents the majority of move-day damage and speeds reassembly at the other end.
| Point | Details |
|---|---|
| Start with the biggest pieces | Beds, wardrobes, and dining tables first; they save the most space and carry the highest damage risk. |
| Photo before you touch anything | Photograph every angle and joint before removing a single fastener; use these images to guide reassembly. |
| Bag and label hardware immediately | One labelled zip-lock bag per piece of furniture, kept in a single master hardware box during transit. |
| Begin at least two days out | Leaving disassembly to move morning causes delays that cascade through the entire day. |
| Hire pros for complex or high-value pieces | Antiques, pianos, and tight-access situations are worth the cost of a professional dismantling service. |
| Onyx Removals handles it end-to-end | Onyx provides disassembly, reassembly, and protective packing as part of its residential moving service. |
Taking furniture apart before a move is not just about fitting things through doorways. It reduces the chance of damage to the item itself, to your walls and door frames, and to the people doing the lifting.
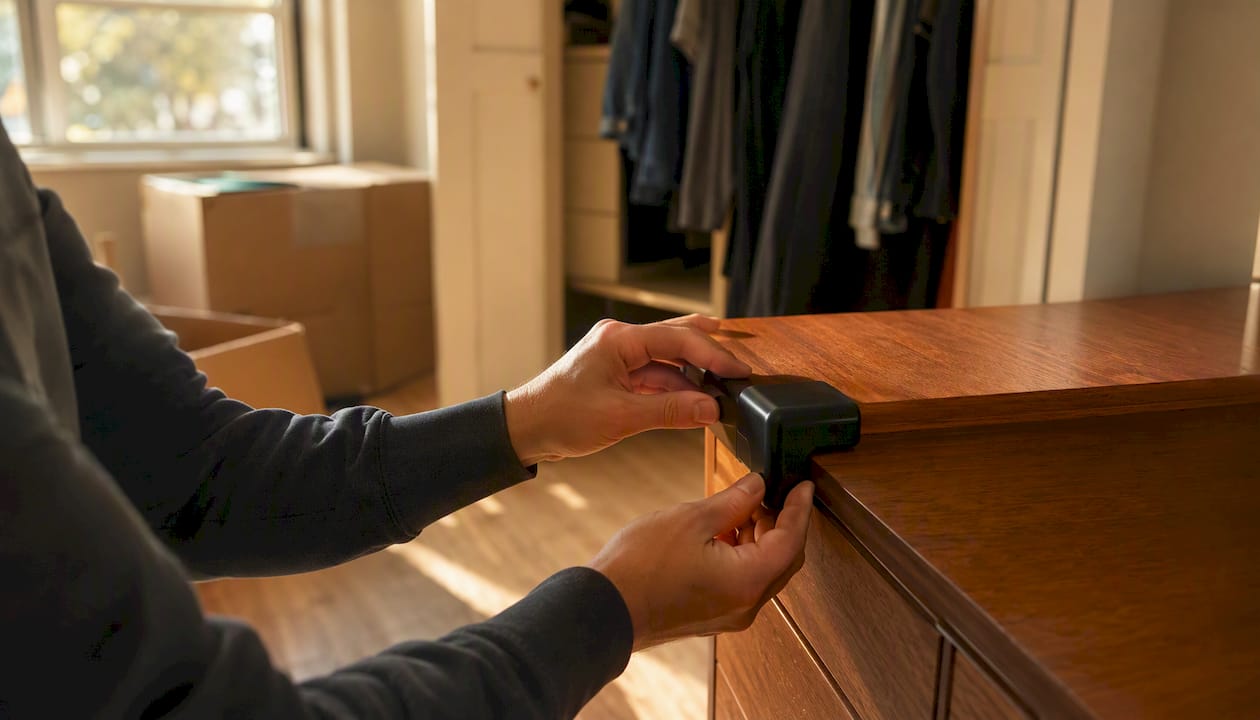
Assembled beds and wardrobes are awkward to carry because the weight is unevenly distributed and the frame flexes under load. Break them into flat panels and the load becomes predictable, lighter per piece, and far easier to stack securely in a truck. Flat panels also sit flush against the truck wall, which means less movement in transit and fewer scratches.
There is a longevity argument too. Design analysis of disassembly-ready products shows that furniture which can be taken apart and reassembled cleanly tends to last longer, because the joints are not stressed by being dragged or forced through tight spaces. Treating disassembly as a preservation step, not just a logistics one, changes how carefully you approach it.
Pro Tip: Prioritise pieces that are both large and fragile at the joints, such as glass-topped dining tables and flat-pack wardrobes. These gain the most from disassembly and are the most expensive to repair if something goes wrong.
The short answer: anything that won’t fit through a doorway assembled, anything with joints that flex under load, and anything that is simply too heavy to lift safely as a single unit.
High-priority pieces to disassemble:
Disassembling large items such as beds, tables, modular lounges, and shelving makes them easier to carry, reduces movement in the truck, and lowers damage risk significantly.
Items that can usually stay assembled: solid timber armchairs, small bedside tables, compact coffee tables, and any piece that fits through your doorways with clearance to spare.
Before you decide, measure your doorways, stair landings, and the truck access point. A wardrobe that is 90 cm wide sounds manageable until you hit a 85 cm door frame.
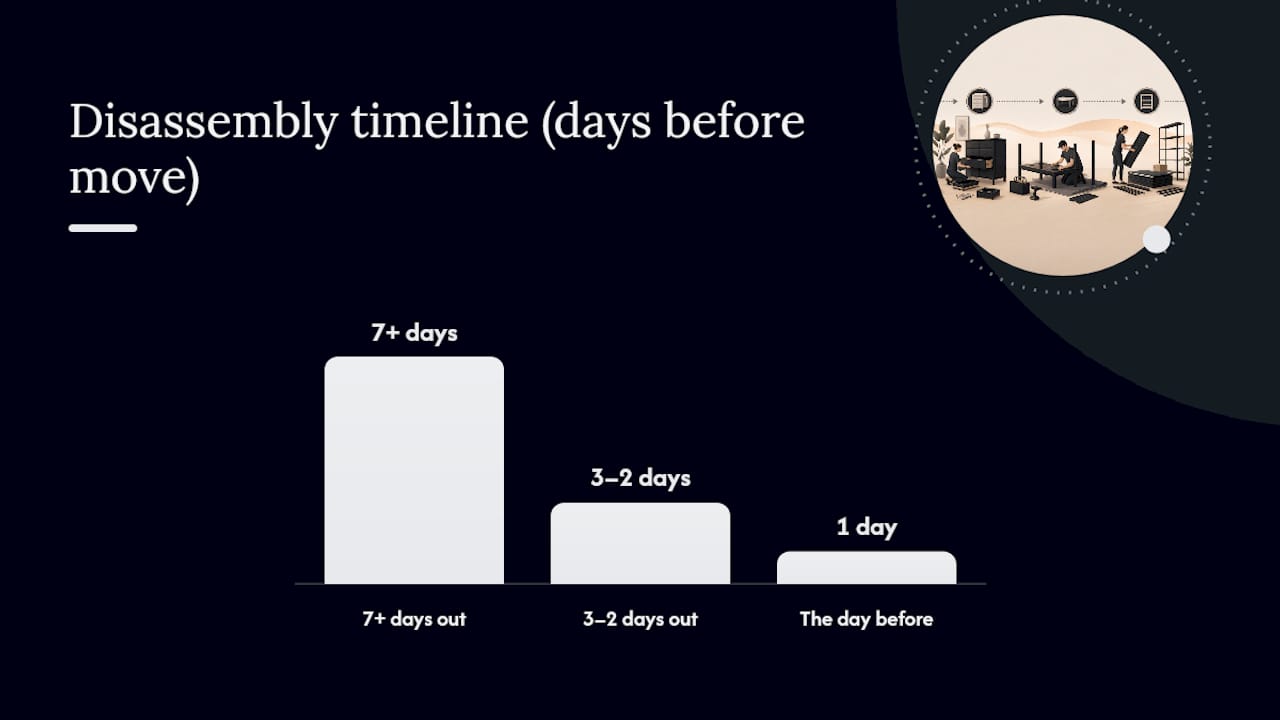
Start disassembly at least two days before the truck arrives. Leaving it to move morning is the single most common mistake, and it cascades into everything else running late.
7 or more days out
3–2 days out
The day before
Move day
A structured disassembly checklist prevents lost screws and speeds reassembly considerably.
Most household furniture comes apart with a surprisingly short list of tools. The minimum kit that covers the majority of jobs:
| Category | Items |
|---|---|
| Must-have | Screwdrivers, allen key set, adjustable spanner, zip-lock bags, masking tape, marker |
| Nice-to-have | Rubber mallet, power drill with screwdriver bits, stretch wrap, furniture pads |
| Professional tools | Furniture dollies, strap ratchets, power impact driver, corner protectors |
Pro Tip: Store all hardware bags inside a single labelled box, not taped to the furniture panels. Tape fails in transit, and a bag of screws rattling loose inside a truck is almost impossible to sort out at the other end.
Prepare your workspace before you touch the furniture. Clear the floor, lay down a moving blanket to protect both the item and your floors, and have your tools and bags within reach.
The Onyx Removals step-by-step disassembly guide covers the full process with tool lists and practical tips for DIY movers.
Safety callouts:
Troubleshooting stuck screws and hidden fasteners:
Stripped screws respond well to a rubber band placed between the screwdriver and the screw head for extra grip. Rusted screws benefit from a small amount of penetrating oil left for 10 minutes before you try again. Hidden fasteners on flat-pack furniture are often concealed under plastic caps or fabric backing; run your fingers along seams and check underneath before assuming a panel is glued.
Pro Tip: Write the reassembly order on a piece of paper and tape it inside the hardware bag. “Step 1: attach side panels to base. Step 2: insert shelf pins.” You’ll thank yourself at midnight in a new house.
Reassemble in reverse order, using your photos as the reference. Lay out all components and check every bag of hardware before you start.
Short reassembly checklist:
If hardware is missing, most flat-pack manufacturers sell replacement fasteners directly. IKEA’s spare parts service, for example, covers the majority of its current range. For older or non-branded furniture, a hardware store with a good fastener section can usually match common bolt sizes.
Pro Tip: If a joint won’t align, don’t force it. Back off all fasteners by half a turn, realign the panels by hand, then retighten evenly. Forcing a misaligned joint cracks the material around the fixing point.
Hire professionals when the risk of DIY outweighs the cost of help, or consider a reliable Furniture Junk Removal Service to safely dispose of unwanted pieces. That decision usually comes down to one of five situations: antiques or high-value pieces where a mistake is expensive, pianos or other specialist items, very tight access (narrow staircases, no lift), a short move window that leaves no time for careful DIY, or a preference to avoid the physical risk entirely.
What professional disassembly services typically include:
Extra-fee triggers to ask about upfront:
Many professional removalists offer disassembly and reassembly, but whether it is included in the base quote or charged as an add-on varies significantly between companies.
Questions to ask any mover before booking:
Red flags to watch for:
For a broader view of what to expect from professional help, the Onyx Removals furniture disassembly and moving guide covers the full scope of residential disassembly services.
The single most common error on move day is not a broken panel or a stripped screw. It’s a bag of hardware that went missing because someone skipped the labelling step and assumed they’d remember which screws belonged where.
On a busy move, the gap between a smooth reassembly and a two-hour puzzle at the other end almost always comes down to documentation. Crews who photograph before they touch anything, label every component before it leaves the room, and keep a master hardware box separate from the furniture panels consistently finish reassembly faster and with fewer callbacks.
The other habit that separates experienced crews from rushed ones: protecting corners before moving panels, not after. A corner protector costs almost nothing. Repairing a gouged door frame or a chipped wardrobe panel costs considerably more, and the damage usually happens in the first 30 seconds of a carry, not at the end.
Clients who prepare their own furniture using a photo-first, label-everything approach before the crew arrives make the whole job faster. The crew spends less time figuring out what goes where and more time moving. That efficiency often translates directly into fewer hours billed.
Onyx Removals offers furniture disassembly and reassembly as part of its residential removal service, covering Melbourne and surrounding areas. If the DIY route looks too time-consuming or the furniture is too complex to risk, this is the practical alternative.
The service includes a pre-move assessment, trained technicians with all tools supplied, protective packing for every component, and reassembly with stability checks at the destination. You don’t need to source blankets, allen keys, or zip-lock bags. You don’t need to spend a weekend on the floor with an instruction sheet.
Pair disassembly with Onyx’s professional packing service and the entire preparation side of your move is handled in one visit. To get a quote or book a pre-move assessment, visit the Onyx Removals residential service page and request a call-back.
The resources below are a mix of manufacturer guidance, design commentary, and Onyx Removals brand pages. The Onyx links are brand resources; the others are manufacturer or industry references.

No Related Post


