


Downsizing before a move sounds daunting, especially when the average Aussie home holds over 300,000 items tucked away in cupboards and drawers. Most people reckon decluttering means just binning old clutter, then calling it a day. Turns out, the real secret is a systematic approach that not only saves space but can leave you more organised and less stressed than ever before.
| Key Point | Explanation |
|---|---|
| 1. Assess belongings thoroughly | Conduct a room-by-room inventory to understand what you have and decide what to keep, sell, donate, or discard. |
| 2. Create a detailed downsizing plan | Develop a timeline, budget, and spatial layout for your new living area to streamline the downsizing process. |
| 3. Categorise items into four groups | Sort belongings into “keep”, “donate”, “sell”, and “discard” to simplify decision-making and reduce stress during the process. |
| 4. Dispose of items responsibly | Research local charities and recycling options to ensure unwanted items are donated or recycled rather than thrown away. |
| 5. Prepare an essential items kit | Assemble a kit with crucial items you need for the first few days after moving, ensuring comfort and accessibility during the transition. |
Downsizing before moving represents a transformative journey that begins with a comprehensive assessment of your current living situation. This critical first step involves gaining a clear understanding of your existing belongings, space requirements, and personal needs before initiating the decluttering process.
Start by conducting a thorough inventory of your current living space. Walk through each room systematically, documenting items you own and their current utility. This means examining everything from furniture and appliances to clothing and personal memorabilia. Ask yourself pointed questions about each item’s practical value: When was the last time I used this? Does this object serve a current purpose in my life? Would I purchase this item again today?
According to Family Caregiver Alliance, beginning your assessment six to twelve months before your planned move provides significant advantages. This extended timeline allows you to approach downsizing methodically, reducing emotional stress and preventing last minute panic.
Key Assessment Criteria
Photograph rooms and individual spaces to create a visual record. These images will help you track progress, make objective decisions, and provide a reference point during the downsizing process. Consider creating digital or physical spreadsheets categorizing items by potential disposition: keep, sell, donate, discard.
Recognize that assessment is not just about physical items but also understanding your lifestyle transitions. Are you moving to a smaller space? Relocating to a different climate? Transitioning to retirement? Each of these scenarios demands nuanced considerations beyond simple item cataloguing.
Successful assessment means developing a realistic, compassionate approach to your belongings. You’re not just sorting through objects but reimagining how your living environment will support your future goals and comfort. Take time to reflect, be patient with yourself, and view this process as an opportunity for positive personal transformation.
Developing a strategic downsizing plan transforms the overwhelming task of reducing your belongings into a manageable, systematic process. This crucial step bridges the gap between initial assessment and actual implementation, providing a clear roadmap for your moving journey.
Begin by establishing realistic timelines and milestones. Most successful downsizing efforts require at least three to four months of dedicated effort, depending on the volume of possessions and complexity of your living situation. Create a calendar specifically for your downsizing project, marking specific weeks for different areas of your home or categories of items.
According to SeniorLiving.org, creating a detailed floor plan of your new space is instrumental in making informed decisions about what to keep. Measure your new living area and sketch out potential furniture arrangements. This visual representation helps you understand spatial constraints and prevents bringing items that simply won’t fit.
Essential Planning Components
Consider implementing a color coded tracking system for your belongings. Use different stickers or tags to categorize items: green for keep, yellow for potential sale, red for donation or disposal. This visual method makes the sorting process more intuitive and less emotionally taxing.
Financial planning is another critical aspect of your downsizing strategy. Calculate potential income from selling valuable items, budget for moving expenses, and estimate costs of replacing essential items in your new space. This financial clarity reduces stress and helps you make more objective decisions about what to retain.
Your downsizing plan should also incorporate emotional resilience strategies. Recognize that letting go of possessions can trigger complex feelings. Build in regular breaks, seek support from family or friends, and approach the process with compassion towards yourself. A well structured plan acknowledges both practical and emotional dimensions of moving.
Successful plan development means creating a flexible, personalized approach that adapts to your unique circumstances while maintaining clear, achievable goals.
Categorising and sorting your belongings is the transformative heart of downsizing, where theoretical planning transitions into practical action. This step requires emotional resilience, strategic thinking, and a systematic approach to evaluating your possessions with fresh perspective.
Begin by gathering essential supplies: multiple sturdy boxes, coloured stickers or tags, permanent markers, and large garbage bags. Set up distinct staging areas in a central space like your living room or garage where you can sort items without disrupting your entire home. These designated zones become your sorting command centre, allowing methodical decision making.
According to AARP, effective categorisation involves creating clear, decisive groups for your belongings. Develop four primary categories: keep, donate, sell, and discard. This straightforward system prevents decision paralysis and provides immediate clarity.
Sorting Approach Categories
Work systematically through each room, handling items individually and making immediate placement decisions. Avoid revisiting items multiple times, which can lead to emotional exhaustion. For sentimental objects, consider photographing them before letting go, preserving memories without maintaining physical clutter. If you struggle with specific items, read more about managing moving transitions.
Utilise the one year rule as a practical guideline: if you have not used an item in the past twelve months and it does not hold significant sentimental value, it likely does not need to accompany you to your new space. This principle helps create objective distance from unnecessary possessions.
Consider the financial and emotional cost of moving every single item. Large furniture pieces, rarely used kitchen appliances, and clothing that no longer fits should be critically evaluated. Sometimes selling or donating these items can provide additional moving funds or support community organisations.
Your sorting process is complete when every item in your home has a designated category and location. Take a moment to review your sorted spaces, ensuring you feel confident about your decisions and ready for the next phase of your downsizing journey.
Disposing of unwanted items responsibly transforms your downsizing process from a simple sorting exercise into an environmentally conscious and socially beneficial endeavour. This critical step requires thoughtful consideration of each item’s potential second life and potential environmental impact.
Begin by researching local donation centres, charitable organisations, and recycling facilities in your area. Different items require different disposal methods. Electronics, for instance, need specialised e-waste recycling, while clothing and furniture can often find new homes through donation programs. Local community centres, op shops, and refugee support organisations frequently welcome gently used household items.
According to Environmental Protection Agency, responsible disposal goes beyond simply clearing out space. It involves minimising waste and maximising resource utilisation. Consider hosting a garage sale for items with potential resale value, which not only generates some additional moving funds but also ensures items find new owners.
Responsible Disposal Strategies
For items that cannot be donated or sold, prioritise recycling over landfill disposal. Many municipalities offer specialised recycling programs for challenging items like mattresses, large appliances, and electronic equipment. Learn more about professional moving waste management to understand comprehensive disposal strategies.
Hazardous materials demand extra attention. Paint, cleaning chemicals, batteries, and automotive fluids require specific disposal protocols. Contact local waste management centres to understand proper handling techniques. Many communities host periodic hazardous waste collection events, providing safe disposal options.
Do not underestimate the emotional aspect of letting go. Some items might feel difficult to part with, but remember that responsible disposal means your belongings can potentially help others or be repurposed effectively. Take photographs of sentimental items if you struggle with complete separation, preserving memories without maintaining physical clutter.
Your disposal process is complete when you have systematically addressed every unwanted item through donation, sale, recycling, or responsible disposal, leaving you with a streamlined collection of possessions ready for your next chapter.
To help you quickly compare disposal options and select the most appropriate method for each category of item, here is a summary table:
| Item Type | Best Disposal Method | Typical Recipient/Facility | Notes |
|---|---|---|---|
| Usable household goods | Donate | Local charities, op shops | Ensure items are clean and working |
| Valuable possessions | Sell | Online platforms, garage sale | Can generate extra moving funds |
| Electronics | Specialised e-waste recycling | Council e-waste centre | Do not place in regular landfill |
| Hazardous materials | Hazardous waste disposal | Local waste management centre | Check for scheduled collection days |
| Redundant appliances | Recycle or council pick-up | Council bulky goods service | Many councils offer this for free |
| Clothing | Donate or recycle | Charity bins, textile recycling | Remove soiled or damaged pieces |
| Sentimental items | Gift, donate, or photograph | Family, community groups | Preserves memories if letting go |
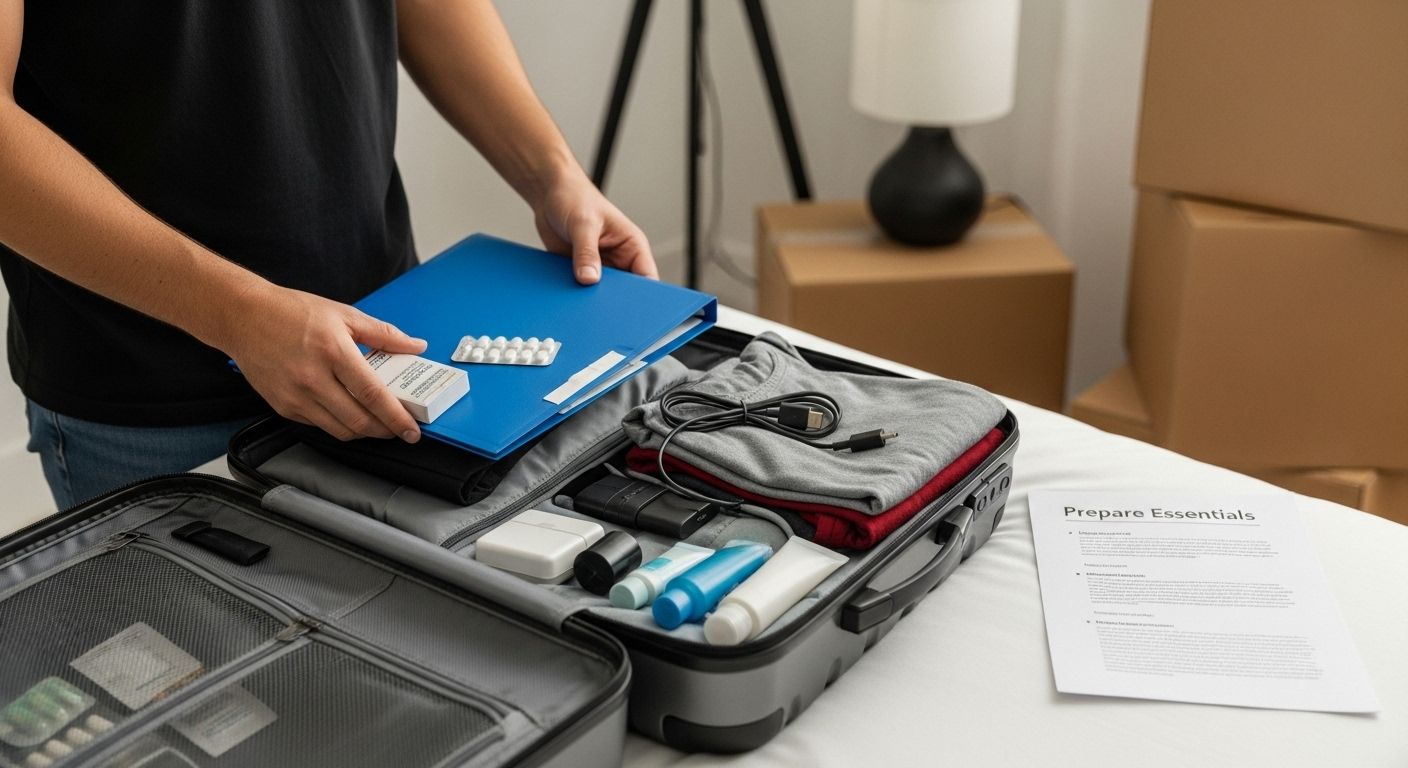
Preparing essential items for moving represents a critical strategic phase where you curate a survival kit that ensures comfort and continuity during your transition. This step transforms potential moving chaos into a carefully orchestrated personal logistics operation, guaranteeing you have precisely what you need when you need it.
Start by selecting a dedicated, easily identifiable container for your essential items. A robust suitcase or clear plastic bin works perfectly, allowing quick access to critical belongings. Prioritise items that cannot be easily replaced or would cause significant disruption if temporarily unavailable. This includes medications, important documents, basic toiletries, a few changes of clothing, and crucial electronic chargers.
According to U.S. Department of Homeland Security, your essential items kit should function like a personal emergency preparedness package. Pack enough supplies to sustain you comfortably for 48 to 72 hours, anticipating potential delays or unexpected complications during your move. Learn more about streamlining your moving process.
Essential Items Checklist
Consider the specific needs of your household. Families with children might include favourite comfort items, while those with pets will want to pack special medications, food, and familiar toys. Technology professionals might prioritise backup drives and essential work equipment. Your essentials package should reflect your unique lifestyle and immediate requirements.
Organise these items strategically. Use clear ziplock bags to protect documents from potential moisture. Create digital backups of critical paperwork and store them in secure cloud services. Label your essentials container prominently and keep it separate from other moving boxes, ensuring it remains accessible throughout the moving process.
Your preparation is complete when you have a self-contained, comprehensive kit that would allow you to function comfortably for several days, regardless of when the remainder of your belongings arrive. This level of preparation transforms potential moving stress into a controlled, manageable experience.
Verifying your downsizing success transforms the abstract process of reducing belongings into a tangible, measurable achievement. This final step provides closure, confirms your strategic efforts, and ensures you have truly optimised your moving preparation with intention and precision.
Begin by conducting a comprehensive physical inventory of your remaining possessions. Walk through each room systematically, comparing your current inventory against the sorting categories you established earlier. Confirm that each item serves a genuine purpose in your upcoming living environment. This is not merely about counting objects, but understanding their practical and emotional value in your new space.
According to National Academies Press, successful downsizing requires intentional, strategic assessment. Create a digital or physical spreadsheet documenting your final item count, categorising belongings by room and functionality. Explore our comprehensive moving preparation resources for additional verification strategies.
Downsizing Verification Checklist
Photograph your sorted and packed spaces as documentary evidence of your progress. These images serve multiple purposes: they provide a visual record of your downsizing journey, help track your organizational process, and can be emotionally reassuring when you feel uncertain about letting go of possessions.
Assess the financial and emotional benefits of your downsizing effort. Calculate the estimated value of items sold or donated, and reflect on the reduced stress and increased clarity you’ve achieved. Consider the environmental impact of responsibly managing your belongings, recognizing that thoughtful reduction contributes to sustainable living practices.
Your verification process is complete when you feel confident that every remaining item has been deliberately chosen, your new space is conceptually prepared, and you have a clear, strategic vision for your upcoming move. This moment represents more than just physical organization it signifies personal growth, intentional living, and a readiness for new beginnings.
Confirming you have completed every stage of downsizing is easier with a clear checklist of success criteria. Use the table below as a reference during your final review:
| Verification Task | How to Complete | Why It Matters |
|---|---|---|
| Remove all unnecessary items | Double-check every room, closet, and drawer | Ensures no clutter remains |
| Essential items properly packed | Review your essentials kit for completeness | Avoids disruptions on move-in |
| Donations and sales finalised | Confirm pick-up/drop-off & payment if applicable | Clears space and closes loose ends |
| Remaining items suit new space | Compare with new floor plan and space limits | Prevents overfilling your new home |
| Document process with photos | Capture images of sorted and packed spaces | Provides tangible evidence and record |
| Assess financial/emotional gains | Reflect on savings and reduced stress | Recognise the value of your efforts |
| Ready for transition | Consider your confidence and comfort moving ahead | Final emotional and practical check |
You have read how overwhelming downsizing before moving can be, from sorting cherished possessions to managing responsible disposal and preparing essentials for a smooth transition. If you are feeling the emotional weight of parting with personal items or are worried about fitting your life into a new space, you are not alone. Our step-by-step guide highlights just how much planning, sorting, and coordination successful downsizing demands—especially when time, energy and clarity are in short supply.
With professional support from Onyx Removals, you can turn the hassle of downsizing into a positive, organised experience. Our team tailors every move to your unique needs, whether you need secure packing, responsible waste disposal, or careful handling of sentimental and high-value belongings. As featured in our moving tips and resources, we help you achieve a seamless move while protecting treasured items and your peace of mind.
Take the next step. Secure your spot with Melbourne’s trusted professionals and make your downsize stress-free today. Visit Onyx Removals to request a personalised plan and discover how comfortable and supported your next move can be.
Begin by assessing your current living situation. Conduct a thorough inventory of your belongings, categorising them into keep, sell, donate, or discard. This initial assessment will help you understand what you need and what can be let go.
Use a straightforward categorisation system: keep, donate, sell, and discard. Work through each room systematically, and avoid revisiting items multiple times to reduce emotional exhaustion. Implementing the one-year rule can also be helpful in deciding what to keep.
Research local donation centres and recycling facilities. Donate usable items to charities, sell valuable items online, and recycle electronics and hazardous materials appropriately. Many communities also organise garage sales and charitable events to help you dispose of items responsibly.
Your essential items kit should include prescription medications, important legal documents, basic toiletries, a change of clothes, phone and laptop chargers, and emergency cash. Pack enough to sustain you comfortably for 48 to 72 hours during your transition.
No Related Post


